Sending an email at the right time can be just as important as the message itself. Whether you’re working across different time zones, preparing emails outside business hours, or simply trying to stay organized, Outlook’s scheduled send feature helps you deliver emails exactly when you want.
Instead of sending an email immediately, you can write it in advance and choose a future date and time for delivery. This is useful for professionals, students, business owners, and anyone who wants better control over email communication.
In this guide, you’ll learn how to schedule send in Outlook, how the feature works on different versions of Outlook, common issues you may encounter, and tips for using scheduled emails effectively.
Why Schedule Emails in Outlook?
Scheduling emails can improve communication and productivity. Rather than remembering to send a message later, Outlook takes care of it automatically.
Some common reasons to schedule emails include:
- Sending emails during business hours
- Working with clients in different time zones
- Preparing messages in advance
- Avoiding late-night email notifications
- Planning follow-up emails
- Managing a busy work schedule
A scheduled email helps ensure your message reaches the recipient at the most appropriate time.
If you’re planning time away from work, you may also want to learn How to Set Out of Office in Outlook.
Which Versions of Outlook Support Scheduled Send?
The scheduled send feature is available in several versions of Outlook, although the exact steps may vary.
You can schedule emails in:
- Outlook for Microsoft 365
- Outlook on the Web
- New Outlook for Windows
- Outlook for Mac
- Outlook mobile (limited availability depending on the version)
The interface may look slightly different, but the process is generally similar.
How to Schedule Send in Outlook (Desktop App)
If you’re using the classic Outlook desktop application, follow these steps.
Step 1: Create a New Email
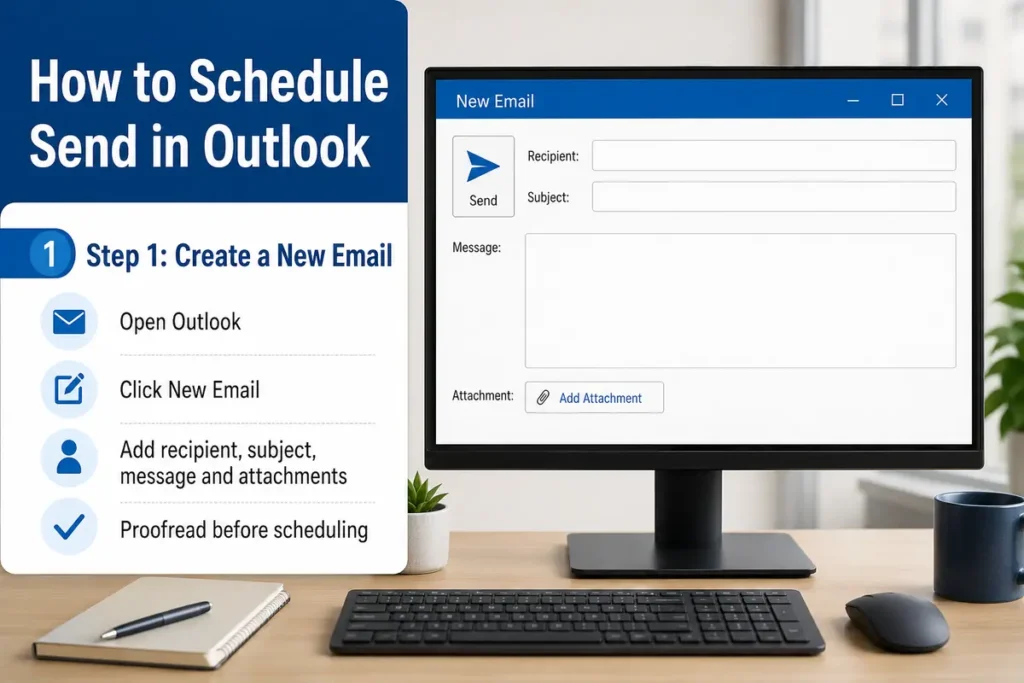
Open Outlook.
Click New Email and compose your message as you normally would.
Fill in:
- Recipient
- Subject
- Email content
- Attachments (if needed)
Take your time proofreading before scheduling.
Step 2: Open the Delay Delivery Settings
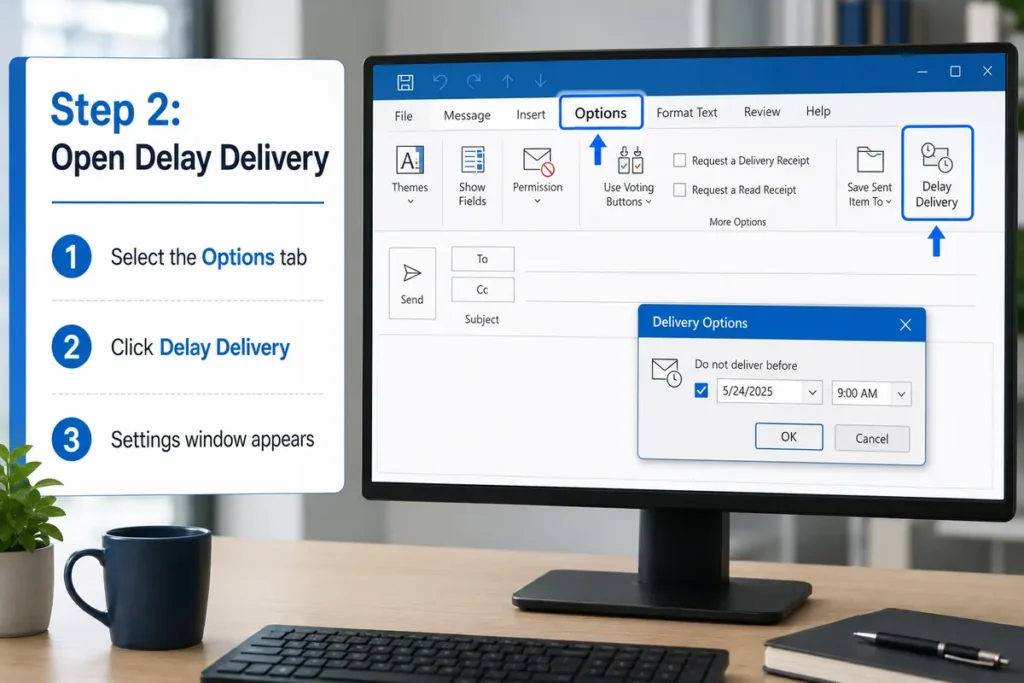
After finishing the email:
Select the Options tab from the toolbar.
Click Delay Delivery.
A new settings window will appear.
Step 3: Choose the Delivery Time
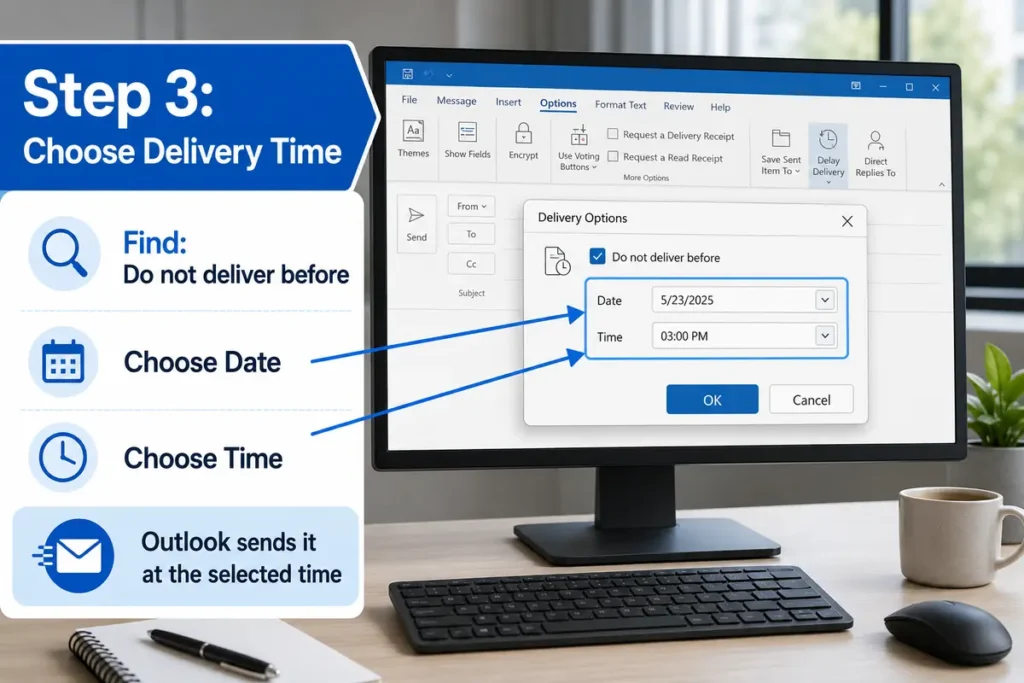
Under Delivery Options, locate:
Do not deliver before
Choose:
- Date
- Time
This tells Outlook exactly when to send your email.
Step 4: Close the Window
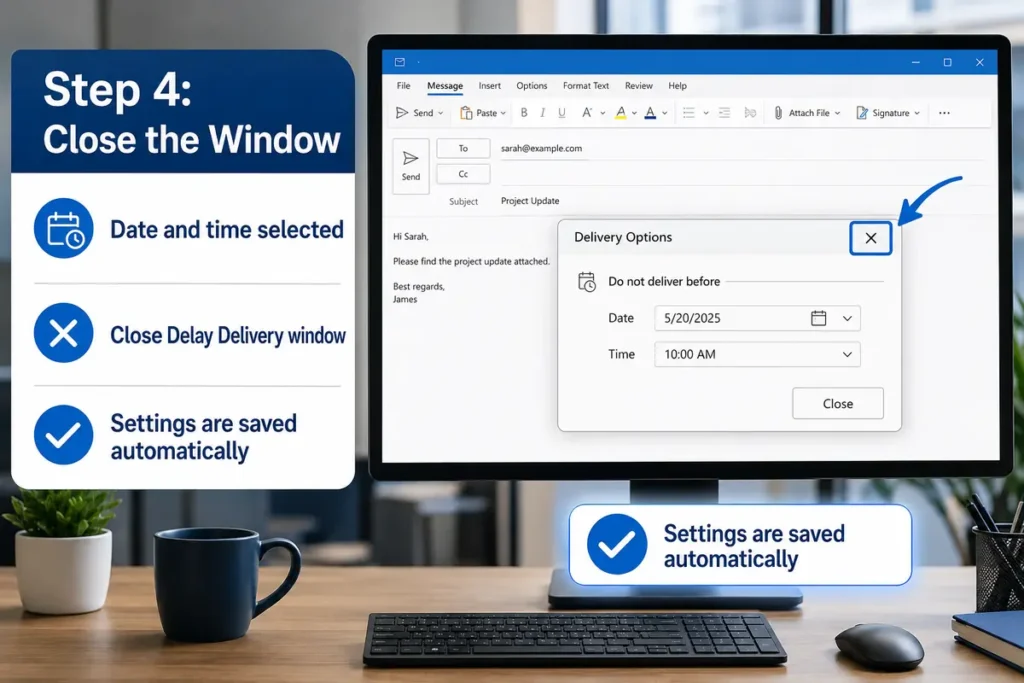
After selecting the date and time, close the Delay Delivery window.
The settings are automatically saved.
Step 5: Click Send
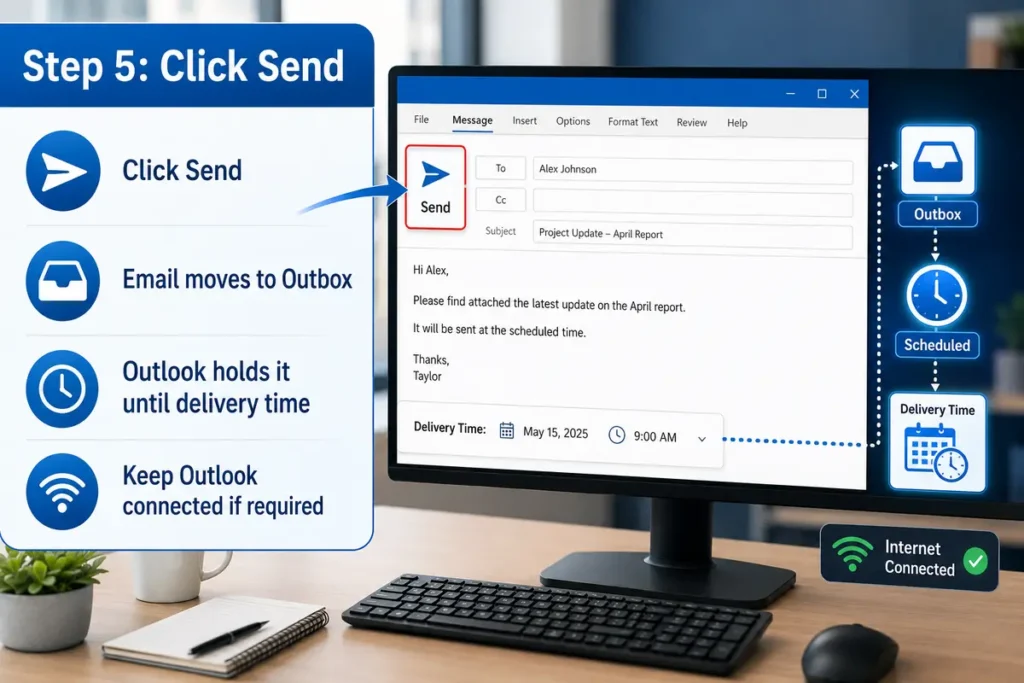
Now click Send.
Although the email leaves your Outbox, Outlook holds it until your selected delivery time.
Keep Outlook connected to the internet if required by your version.
How to Schedule Send in Outlook on the Web
Outlook on the web makes scheduling even easier.
Step 1: Write Your Email
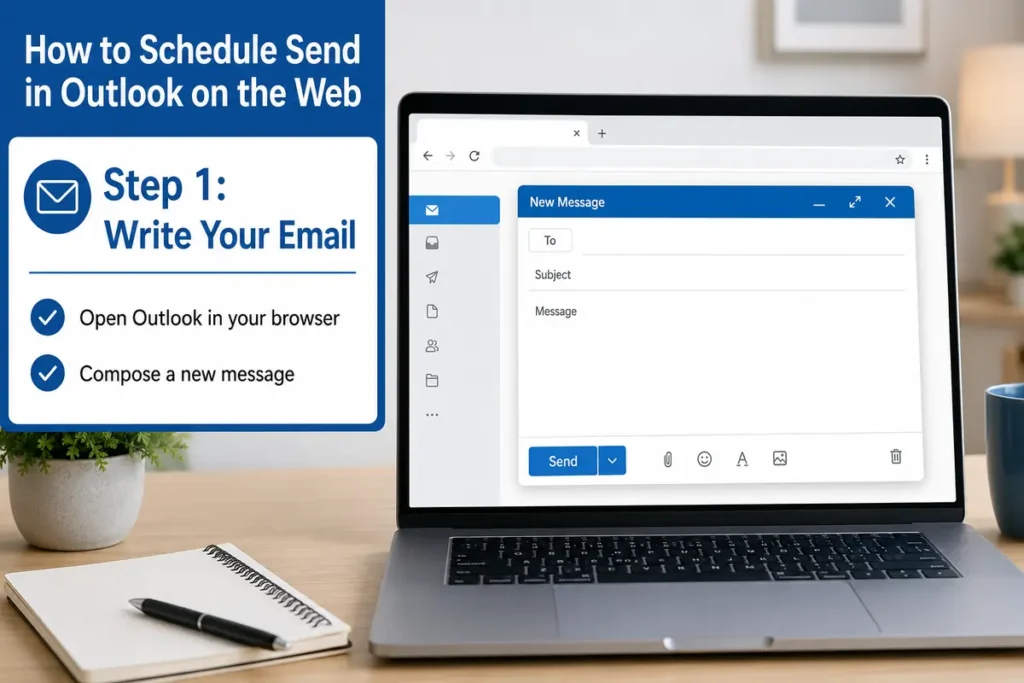
Open Outlook in your browser.
Compose a new message.
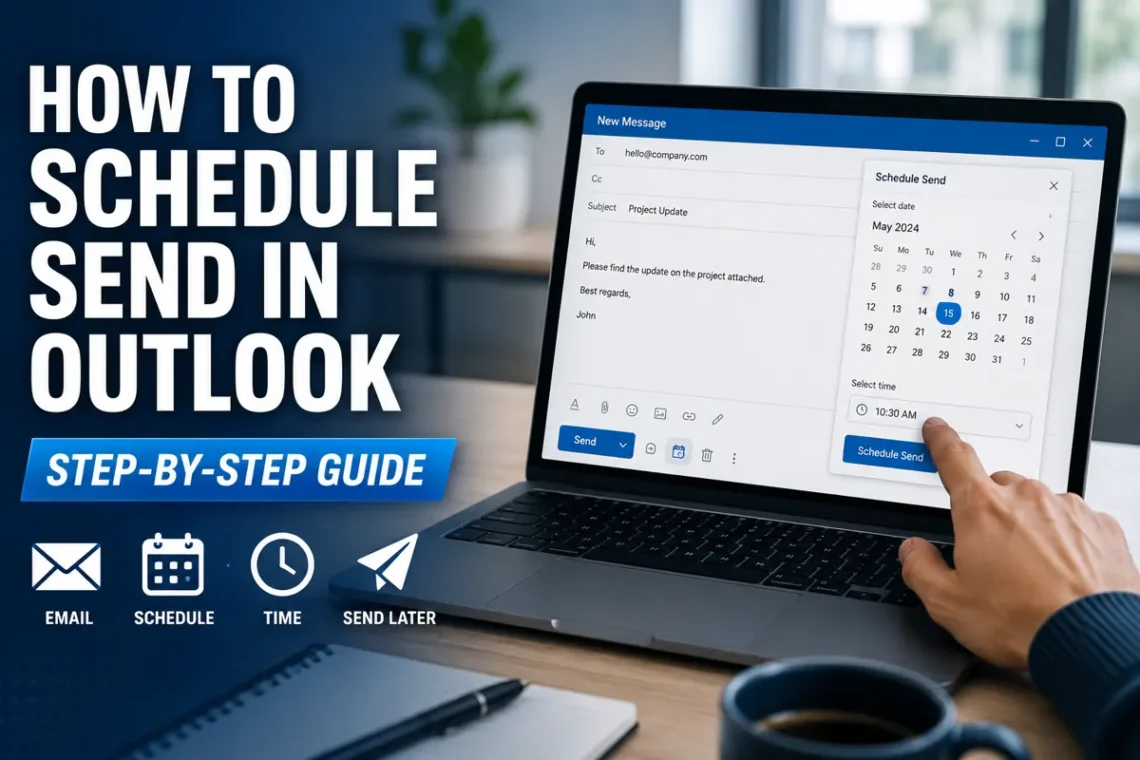
Step 2: Click the Send Arrow
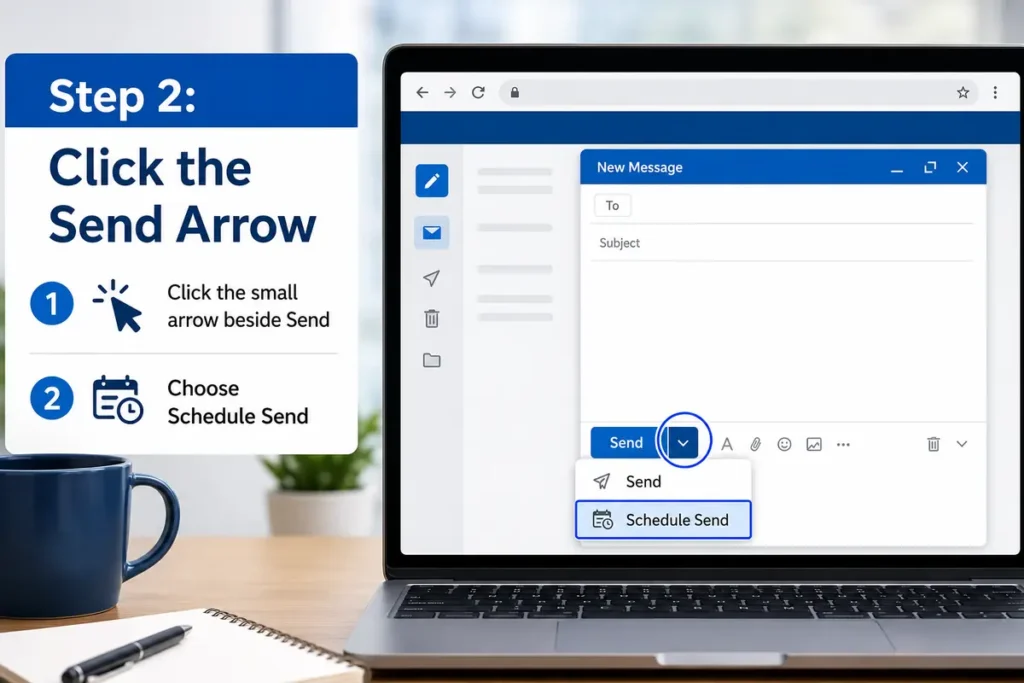
Instead of pressing Send, click the small arrow beside the Send button.
Choose:
Schedule Send
Step 3: Select a Time
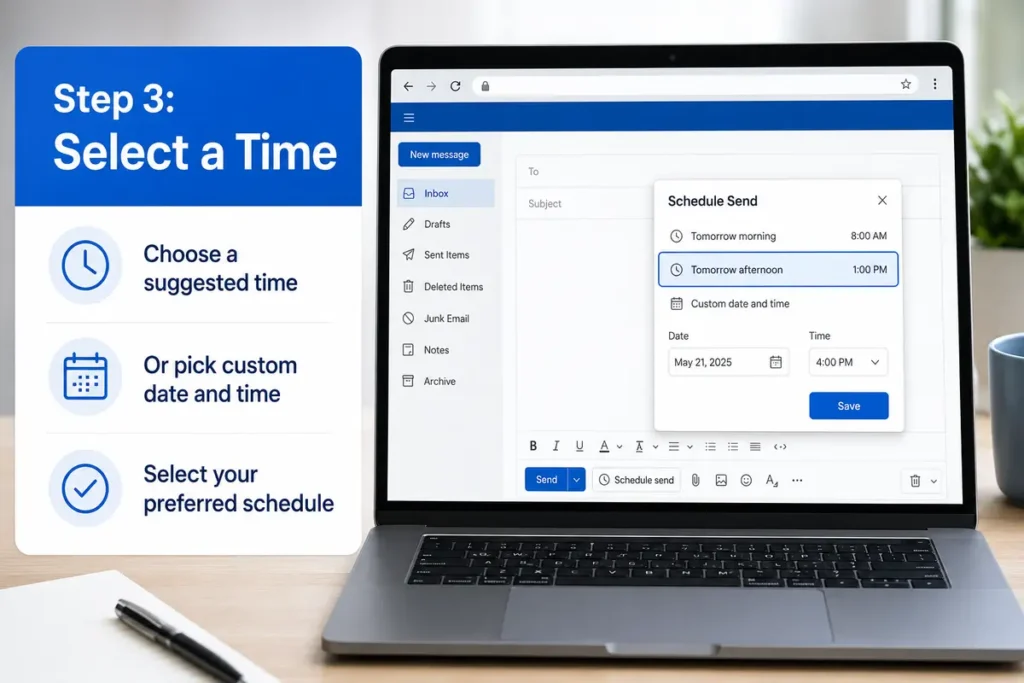
You’ll see suggested times or the option to choose a custom date and time.
Select your preferred schedule.
Step 4: Confirm
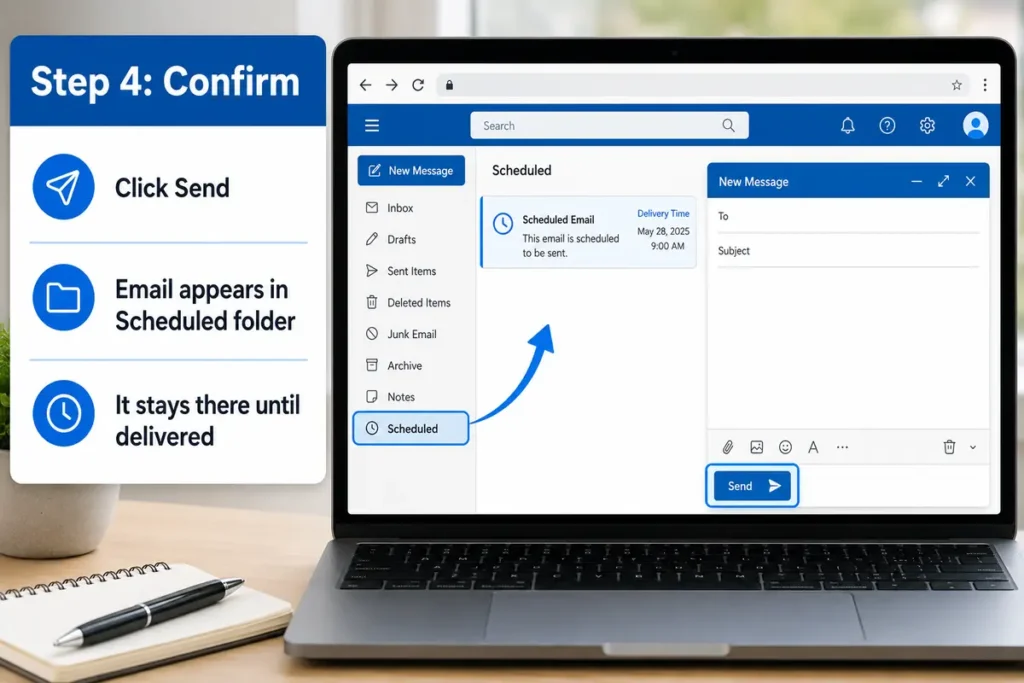
Click Send.
Your email will now appear in the Scheduled folder until it’s delivered.
How to Edit a Scheduled Email
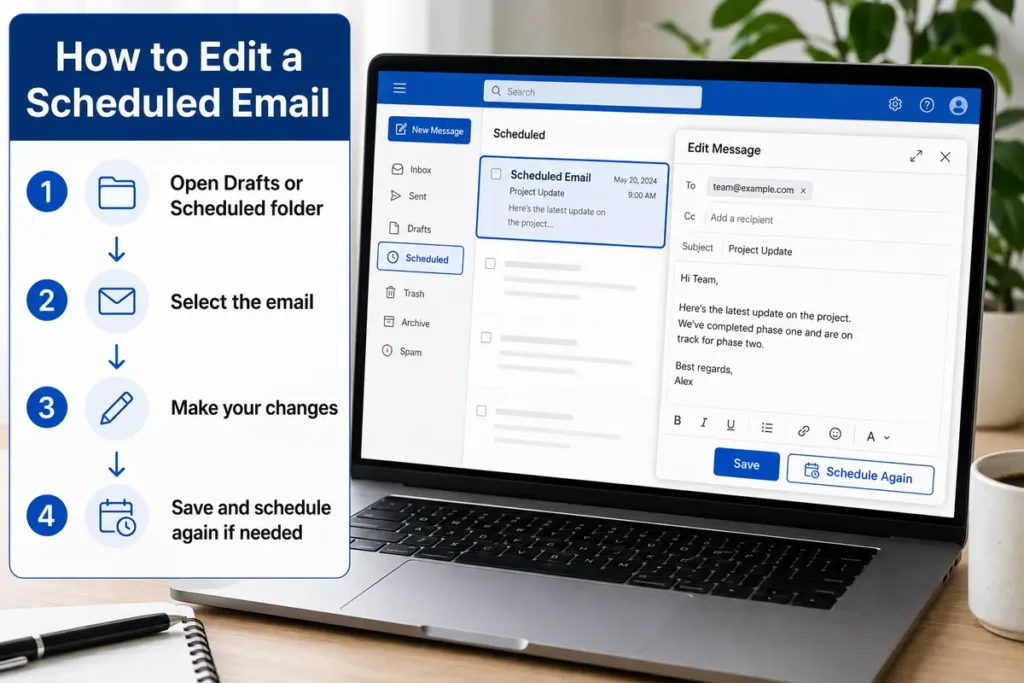
Need to make changes?
You can usually edit the email before it’s sent.
Simply:
- Open the Drafts or Scheduled folder.
- Select the email.
- Make your changes.
- Save and schedule it again if necessary.
This is helpful if plans change before delivery.
How to Cancel a Scheduled Email
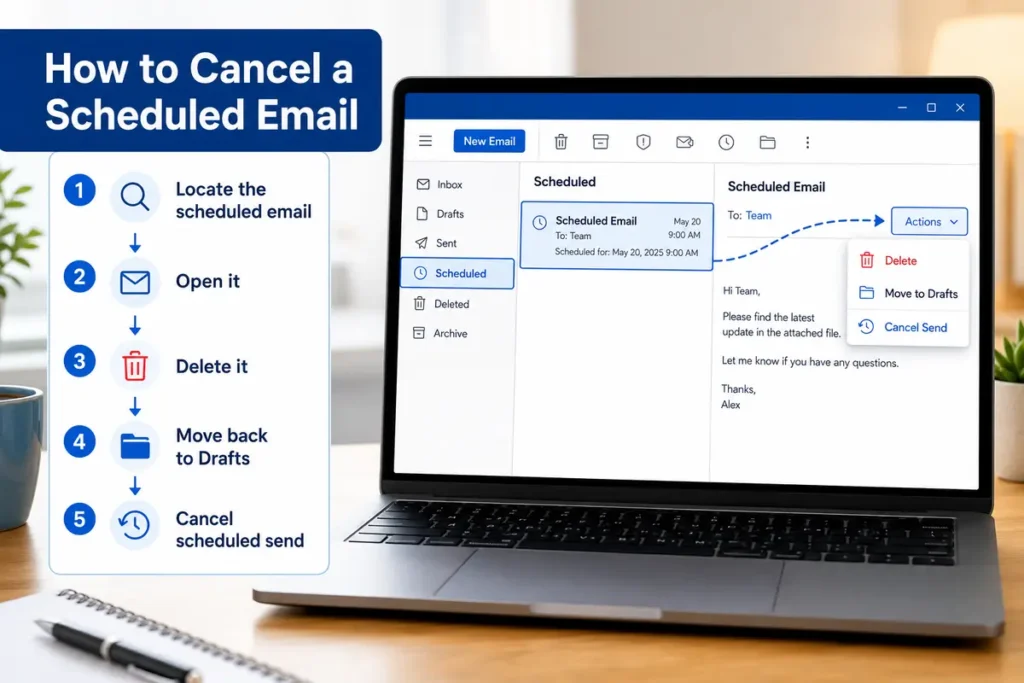
If you decide not to send the message, Outlook makes cancellation simple.
Locate the scheduled email.
Open it.
Choose one of the following:
- Delete it
- Move it back to Drafts
- Cancel the scheduled send option
The exact wording depends on your Outlook version.
What Happens if Outlook Is Closed?
This depends on the version you’re using.
Outlook Desktop
Some desktop versions require Outlook to remain open and connected until the scheduled send time.
If Outlook is closed or your computer is turned off, the email may be sent the next time Outlook reconnects.
Outlook on the Web
Scheduled emails are stored on Microsoft’s servers.
They are sent automatically even if your computer is turned off.
This makes Outlook Web especially convenient.
Common Problems and How to Fix Them
Sometimes scheduled emails don’t send as expected.
Here are a few common issues.
Outlook Was Offline
If Outlook couldn’t connect to the internet, the email may remain in the Outbox until the connection returns.
Incorrect Time Zone
Always check your computer’s date, time, and time zone before scheduling important messages.
Outlook Was Closed
Certain desktop versions need Outlook running until delivery.
If possible, keep the application open.
Exchange or Company Policies
Some workplace accounts have restrictions that affect scheduled emails.
If you’re using a company account, contact your IT administrator if scheduling isn’t available.
If you’re adjusting browser or search settings while troubleshooting, you may also find our guide on How to Turn Off SafeSearch helpful.
Best Practices for Scheduling Emails
Scheduling works best when combined with good email habits.
Consider these tips:
- Double-check attachments before scheduling.
- Review the recipient’s email address.
- Avoid scheduling sensitive emails too far in advance.
- Consider the recipient’s time zone.
- Proofread carefully before clicking Send.
- Use descriptive subject lines.
A few extra seconds can prevent embarrassing mistakes.
If you’re coordinating messages with a team, How to Create a Poll on WhatsApp can also help organize responses.
When Should You Schedule Emails?
Scheduled send is useful in many situations.
Examples include:
- Sending meeting reminders
- Delivering newsletters
- Following up after interviews
- Sending birthday greetings
- Communicating with international clients
- Planning project updates
Many professionals use scheduled emails every day to stay organized.
Outlook Scheduled Send vs Delay Delivery
These two features are closely related but slightly different.
Schedule Send is commonly available in Outlook Web and the newer Outlook interface.
Delay Delivery is primarily used in the classic desktop application.
Both allow you to send emails later, but the menus and settings differ depending on your Outlook version.
Final Thoughts
Learning how to schedule send in Outlook is an easy way to improve your email management and communicate more professionally. Whether you’re using Outlook on the web or the desktop application, scheduling emails helps you stay organized, reach recipients at the right time, and avoid forgetting important messages. Once you get into the habit of using this feature, you’ll likely find it becomes a valuable part of your daily workflow.
Looking for more account and subscription management tutorials? Don’t miss our guide on How to Cancel YouTube TV Subscription.
FAQs
1. Can I schedule an email in Outlook for any date?
Yes. You can choose a future date and time that suits your needs.
2. Can I edit a scheduled email?
Yes. As long as it hasn’t been sent, you can usually open and edit it.
3. Does Outlook need to stay open?
Some desktop versions do, while Outlook on the web does not.
4. Can I cancel a scheduled email?
Yes. Open the scheduled message before it’s sent and delete or edit it.
5. Is scheduled send available on mobile?
Some Outlook mobile versions support it, but availability may vary depending on your app version and account.
📚 Related Guides
Looking for more Microsoft Outlook and tech tutorials? Check out these helpful step-by-step guides: