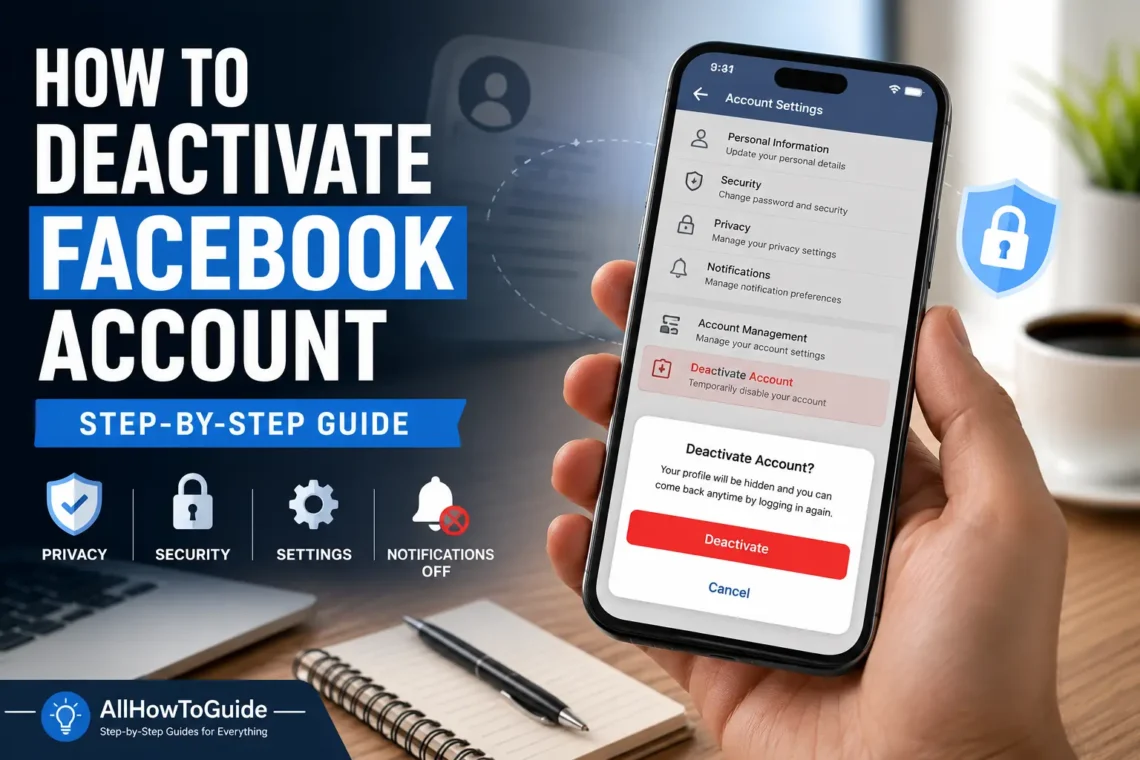
Social media can be a great way to stay connected with friends and family, but there are times when taking a break is the best decision. Whether you’re looking to reduce screen time, protect your privacy, focus on work, or simply disconnect for a while, learning how to deactivate Facebook account is a simple and effective solution.
Unlike deleting your account, deactivating Facebook is temporary. Your profile is hidden from other users, but your information remains saved so you can reactivate your account whenever you’re ready.
This guide explains exactly how to deactivate your Facebook account on both mobile devices and computers, what happens after deactivation, and how to reactivate it later.
If you’re reviewing your device’s privacy settings, don’t miss our tutorial on How to Turn Off SOS on iPhone.
What Does It Mean to Deactivate a Facebook Account?
Deactivating your account temporarily removes your Facebook profile from public view without permanently deleting your information.
When your account is deactivated:
- Your profile becomes invisible to most users.
- Your timeline is hidden.
- Your name may still appear in messages you’ve already sent.
- Facebook saves your information for future reactivation.
- You can return anytime by logging in again.
This makes deactivation a good option if you simply want a break instead of leaving Facebook forever.
If you’re planning to leave social media completely, you may also want to read our guide on How to Delete Snapchat Account, which explains how to permanently remove your Snapchat profile.
Deactivating vs. Deleting Your Facebook Account
Many people confuse these two options, but they’re very different.
Deactivating
- Temporary
- Can be reversed anytime
- Photos and posts remain saved
- Friends list stays intact
- Login restores everything
Deleting
- Permanent
- Cannot be recovered after Facebook’s deletion period
- Photos, posts, and profile are removed
- Requires creating a new account if you return
If you’re unsure, deactivation is usually the safer choice.
Things to Do Before Deactivating Facebook
Before you deactivate your account, it’s worth taking a few minutes to prepare.
Consider:
- Downloading a copy of your Facebook data.
- Saving important photos or videos.
- Checking accounts that use Facebook Login.
- Informing close friends if they’ll need another way to contact you.
- Reviewing connected apps and services.
These small steps can prevent inconvenience later.
How to Deactivate Facebook on the Mobile App
If you primarily use Facebook on your phone, follow these steps.
Step 1: Open Facebook
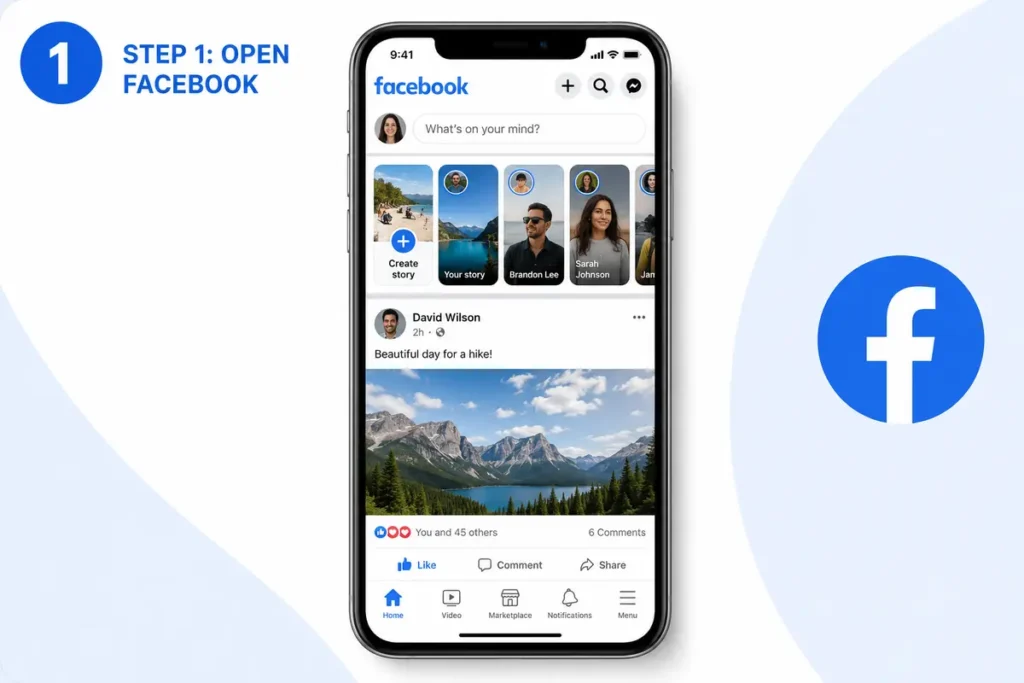
Launch the Facebook app and sign in if necessary.
Step 2: Open the Menu
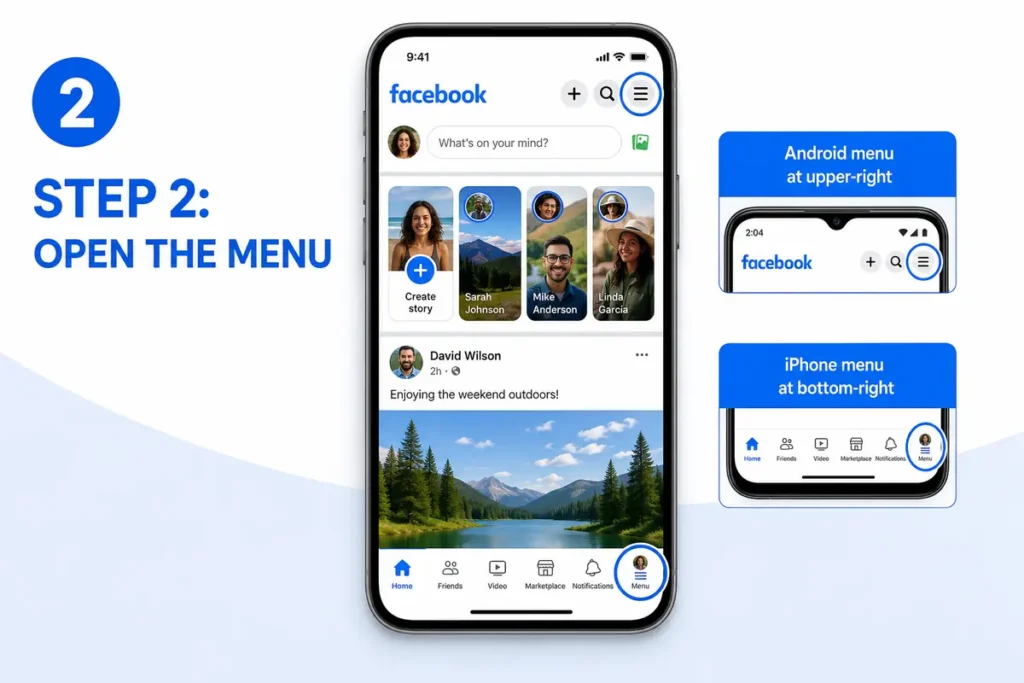
Tap the Menu icon.
On Android, it’s usually in the upper-right corner.
On iPhone, it’s generally located at the bottom-right.
Step 3: Go to Settings
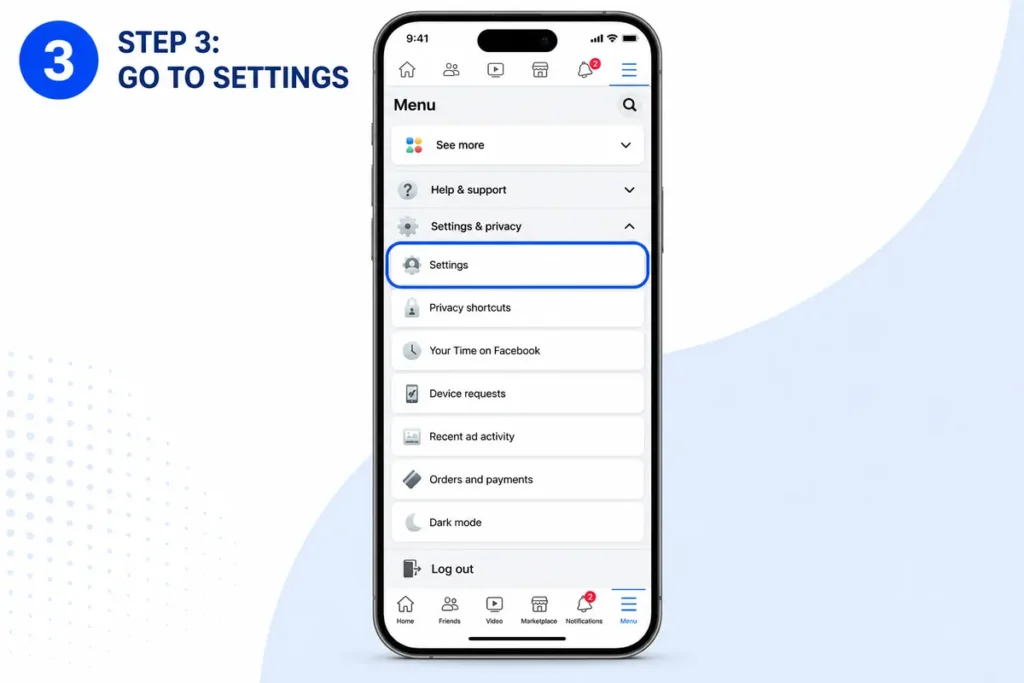
Scroll down.
Tap Settings & Privacy.
Then tap Settings.
Step 4: Open the Account Center
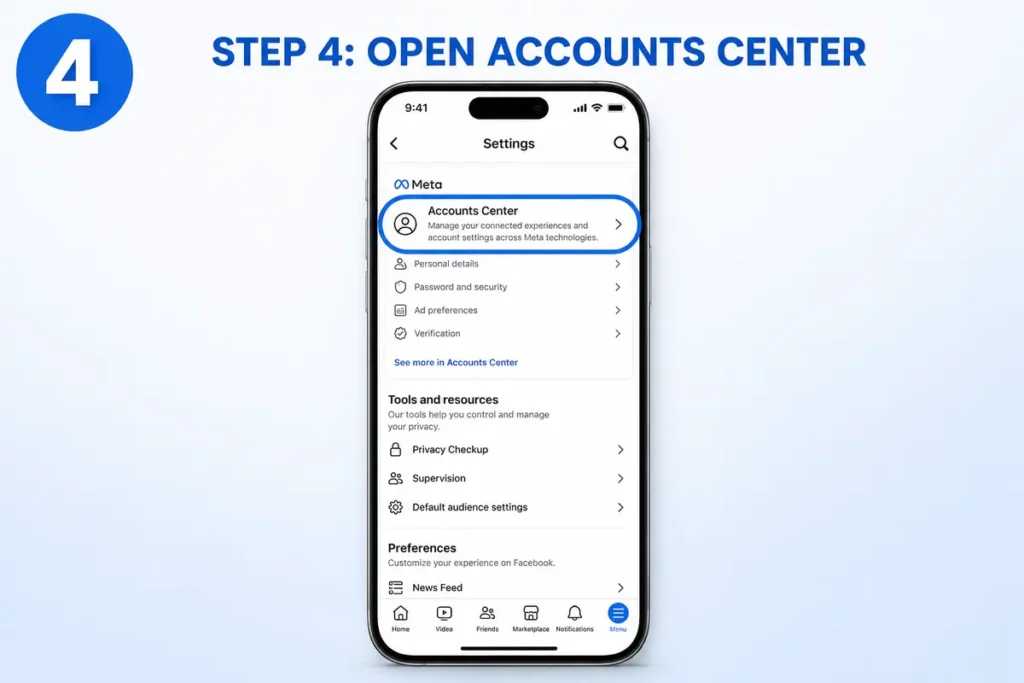
Scroll until you find Accounts Center.
Select it.
Step 5: Choose Personal Details
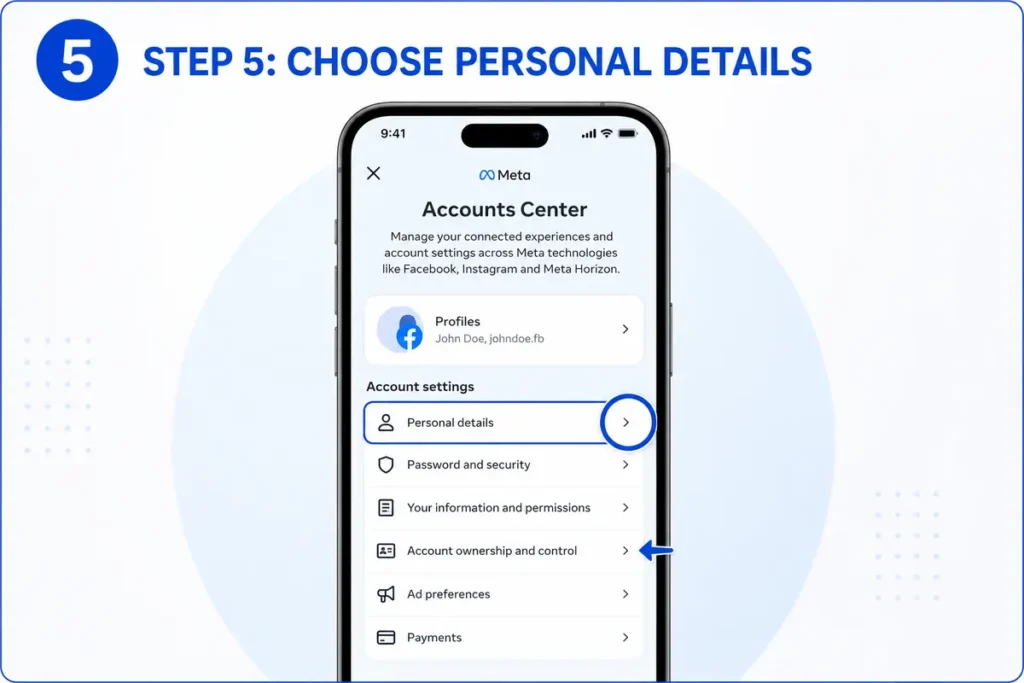
Tap:
Personal Details
Then select:
Account Ownership and Control
Step 6: Select Deactivation or Deletion
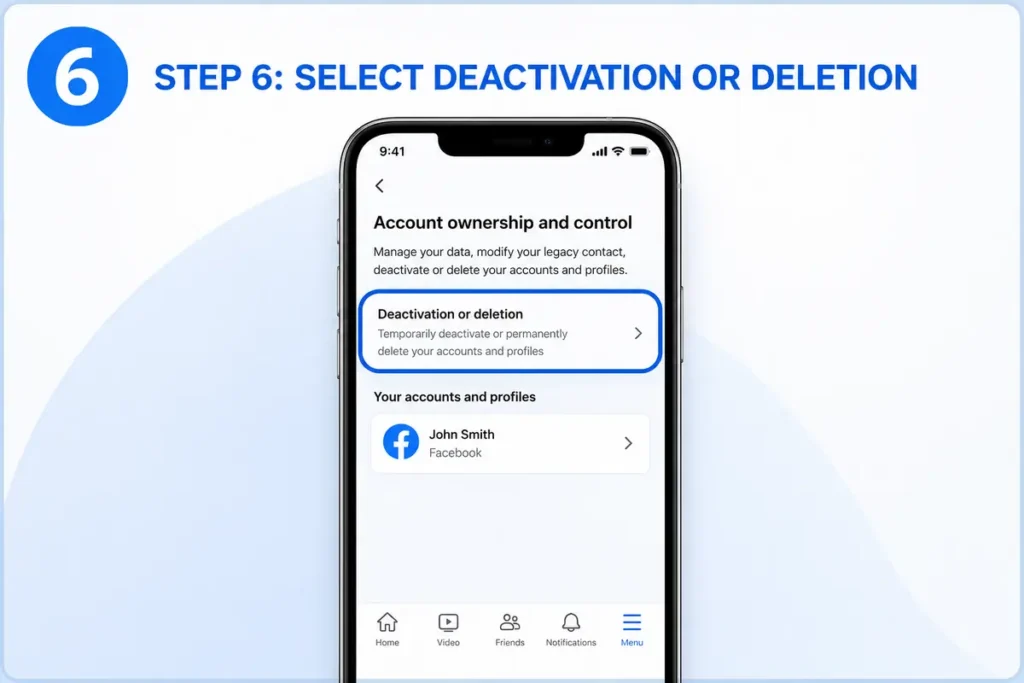
Choose:
Deactivation or Deletion
Select the Facebook account you want to manage.
Step 7: Choose Deactivate Account
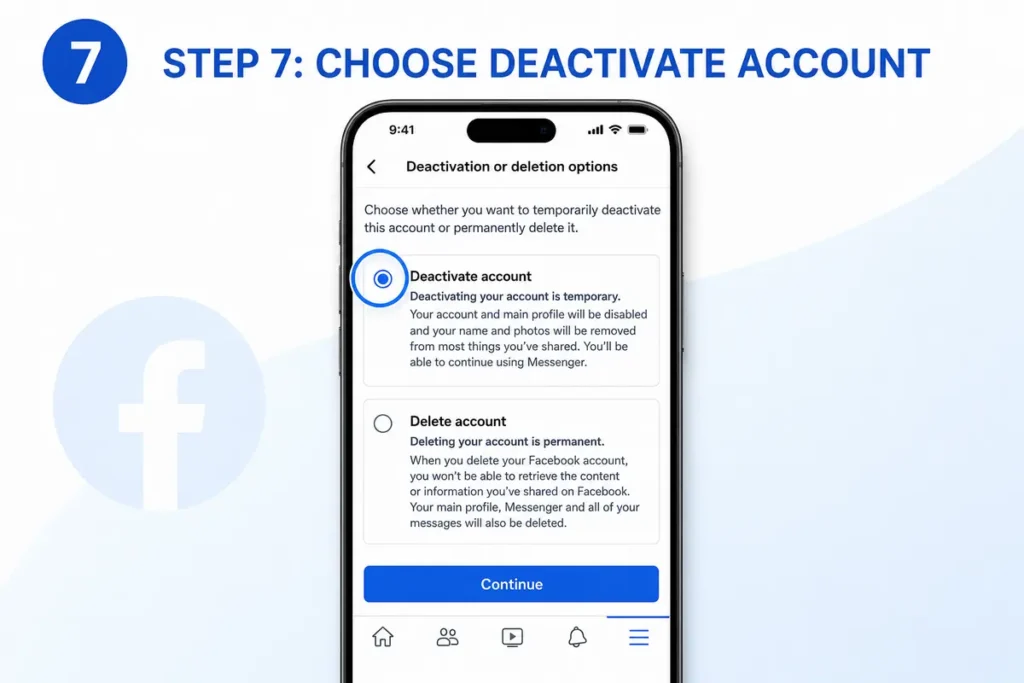
Tap:
Deactivate Account
Follow the on-screen instructions.
Facebook may ask for your password.
Step 8: Confirm
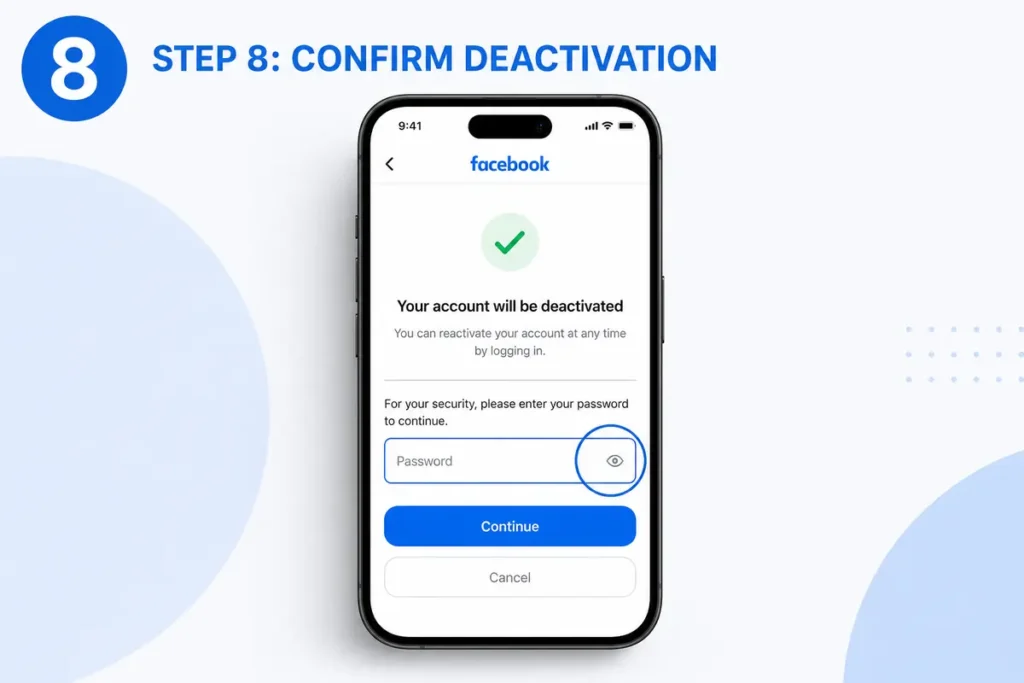
Review the information.
Tap Continue.
Your account will now be deactivated.
Learning more about your smartphone can make everyday tasks easier. Our guide on How to Convert Picture to PDF on iPhone shows another useful built-in feature.
How to Deactivate Facebook on a Computer
You can also complete the process from a web browser.
Step 1: Log In
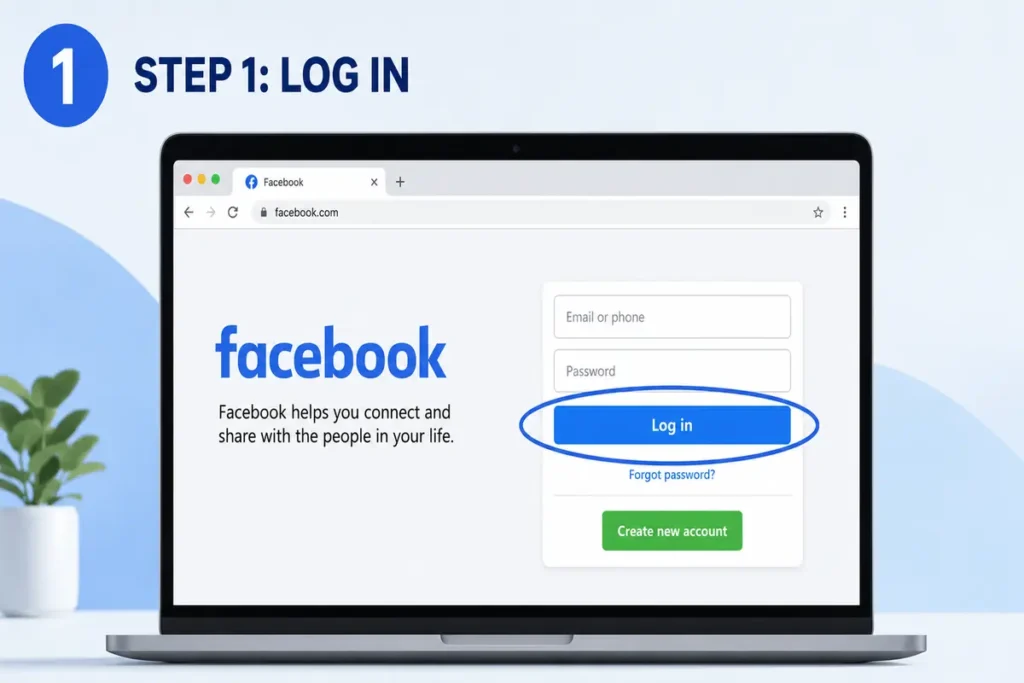
Visit Facebook and sign into your account.
Step 2: Open Settings
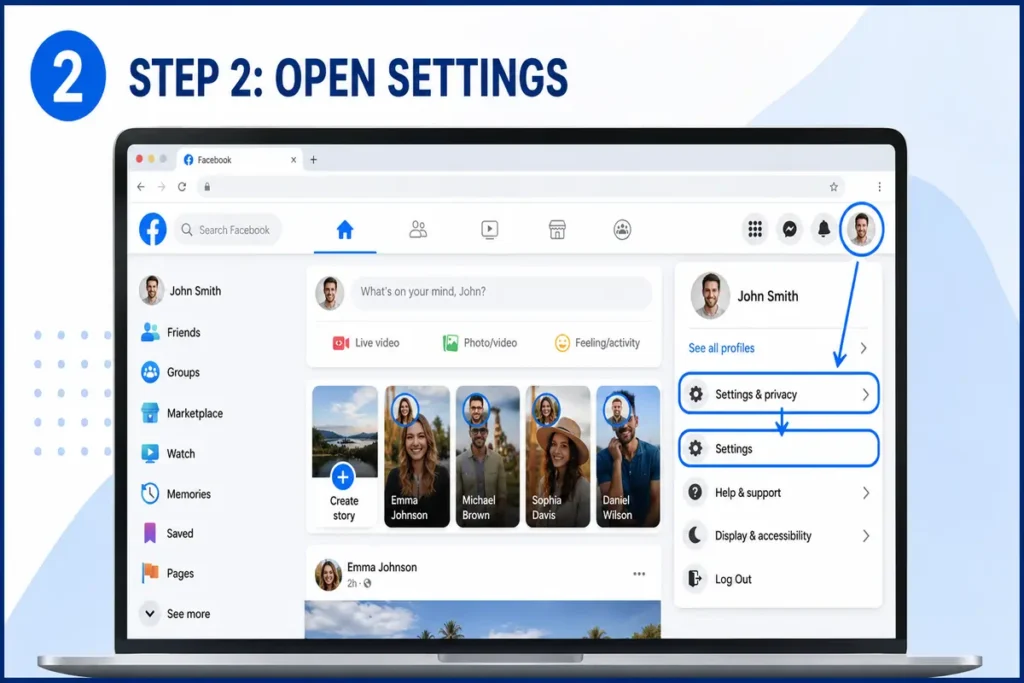
Click your profile picture.
Choose:
Settings & Privacy
Then click:
Settings
Step 3: Open Accounts Center
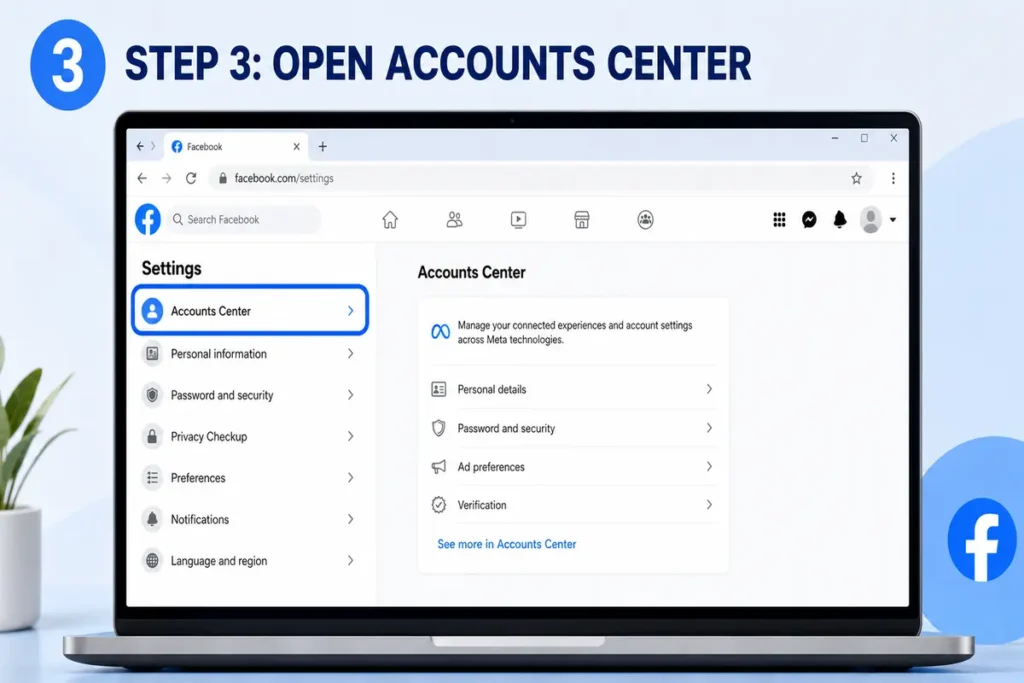
Locate Accounts Center in the left menu.
Step 4: Go to Personal Details
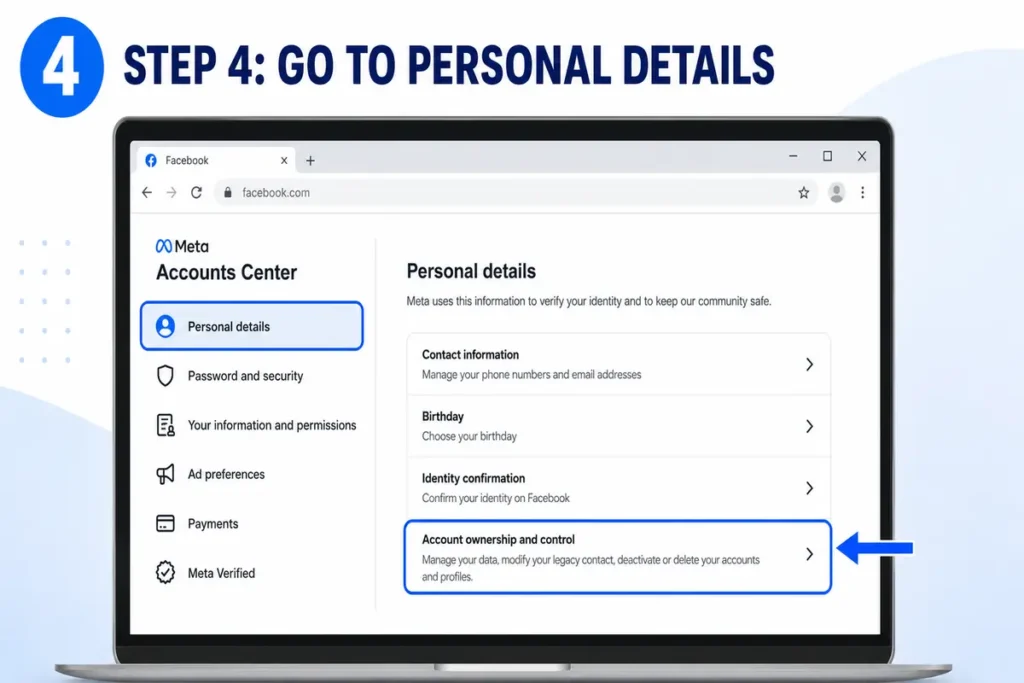
Click:
Personal Details
Then choose:
Account Ownership and Control
Step 5: Select Deactivation
Choose:
Deactivation or Deletion
Select your account.
Click:
Deactivate Account
Step 6: Confirm Your Password
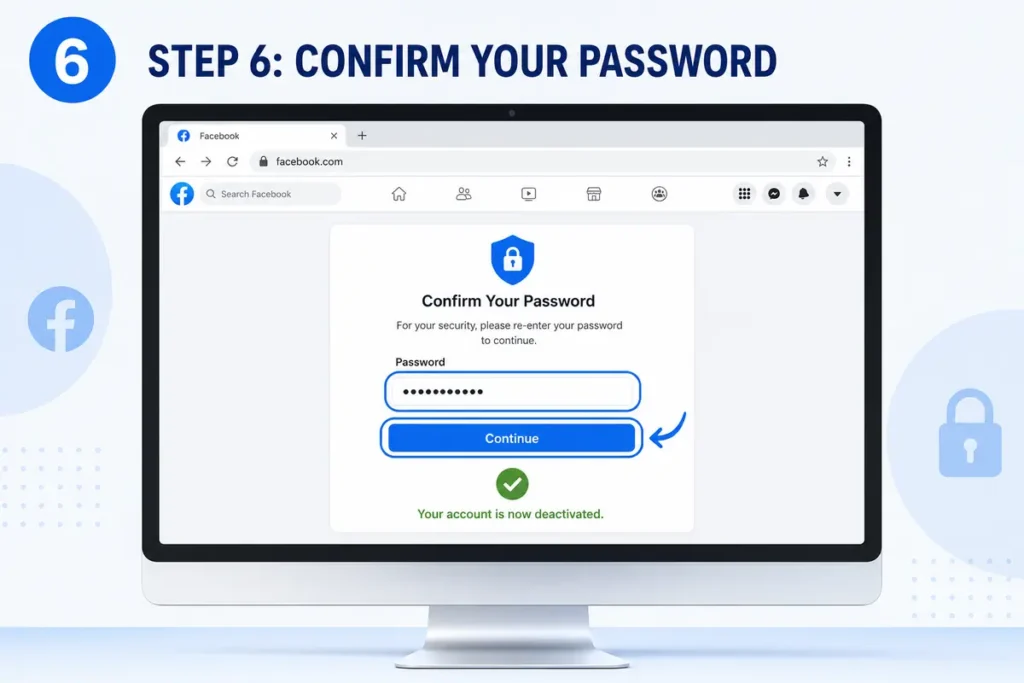
Facebook asks you to verify your identity.
Enter your password.
Click Continue.
Your account is now deactivated.
What Happens After You Deactivate Facebook?
Many people wonder what changes after deactivation.
Here’s what normally happens:
- Friends cannot visit your profile.
- Your timeline becomes hidden.
- Tagged photos remain visible if posted by others.
- Messages you’ve already sent remain in conversations.
- Pages you manage may require another administrator.
- Messenger may remain active depending on the option you choose during deactivation.
Most of your information stays safely stored until you return.
Can You Still Use Messenger?
In many cases, yes.
During the deactivation process, Facebook may allow you to continue using Messenger.
If you choose this option:
- Friends can still message you.
- Your Messenger profile remains active.
- Your Facebook timeline stays hidden.
If you don’t want to use Messenger either, choose the option to deactivate it as well.
How to Reactivate Your Facebook Account
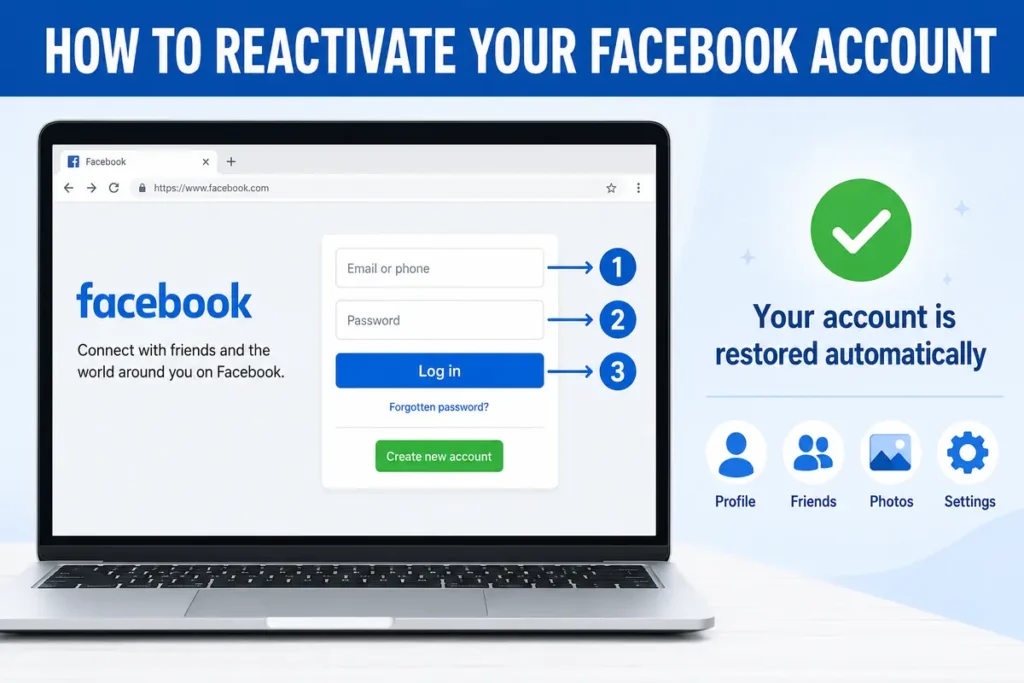
Returning is easy.
Simply:
- Open Facebook.
- Enter your email or phone number.
- Type your password.
- Log in.
Your profile, friends, photos, and settings are restored automatically.
Keeping your Apple devices working properly is just as important. Learn How to Change AirTag Battery in our simple step-by-step guide.
Common Reasons People Deactivate Facebook
Everyone has different reasons for taking a break.
Some of the most common include:
- Reducing screen time.
- Improving mental well-being.
- Avoiding distractions.
- Protecting privacy.
- Preparing for exams.
- Focusing on work.
- Spending more time offline.
- Limiting social media use.
Taking a break doesn’t necessarily mean you’re leaving forever.
Troubleshooting Common Problems
Sometimes users experience issues during deactivation.
Can’t Find the Option
Facebook occasionally changes its settings layout.
Use the search feature inside Settings to locate “Deactivation.”
Forgot Your Password
Reset your password before attempting to deactivate.
Multiple Facebook Accounts
Be sure you’re signed into the correct account before making changes.
Facebook Login for Other Apps
Some apps rely on Facebook for sign-in.
Update your login method beforehand if needed.
Privacy Tips Before Leaving Facebook
Whether your break lasts a few days or several months, protecting your information is important.
Consider:
- Removing unnecessary personal details.
- Reviewing privacy settings.
- Checking active login sessions.
- Updating recovery information.
- Enabling two-factor authentication.
These steps improve account security even if you return later.
Final Thoughts
Learning how to deactivate Facebook account is useful if you want to take a temporary break without permanently losing your photos, friends, or personal information. The process takes only a few minutes on both mobile devices and computers, and you can reactivate your account at any time by simply logging back in. If you’re unsure about permanently deleting Facebook, deactivation offers a flexible way to step away while keeping your account available for the future.
Looking for more practical technology tutorials? You might also like our guides on How to Check Motherboard Model and How to Convert Picture to PDF on iPhone.
FAQs
1. Can I reactivate my Facebook account anytime?
Yes. Simply log back in using your email or phone number and password.
2. Will my friends know I deactivated Facebook?
Facebook doesn’t notify your friends, but they may notice your profile is no longer visible.
3. Can I still use Messenger?
Yes, if you choose to keep Messenger active during deactivation.
4. Is deactivating the same as deleting Facebook?
No. Deactivation is temporary, while deletion permanently removes your account after Facebook’s deletion period.
5. Will my photos be deleted after deactivation?
No. Your photos remain saved and are restored when you reactivate your account.
📱 Related Social Media & Tech Guides
Looking for more helpful technology and account management tutorials? Continue with these step-by-step guides: